

How to use a smart sleep mask: charge it fully, adjust the strap until it blocks light without pressing on your eyes, pair it with the app, then add features like heat, sound and guided breathing one at a time over your first seven nights. Most “it doesn’t work” complaints come from skipping those first steps, not from the mask itself.
You’ve opened the box, and now there’s a sleek mask, a charging cable and a quick-start card. It’s tempting to strap it on and hope for magic. I get it. But a smart mask is closer to a new pair of running shoes than a light switch. It works best once it fits you and you’ve given your body a few nights to adjust.
This guide walks you through the first week, night by night. If you want the engineering behind the sensors first, our How It Works page covers it. This article is the practical companion: what to do, in what order, and what to expect.
What Is a Smart Sleep Mask, and What Should You Expect in Week One?
A smart sleep mask is an eye mask that blocks light and adds sleep-support features such as sensors, audio, gentle heat and an app connection. Features vary by model, so always check the product page for yours.
On the Hypnuse range, the smart models are built around a few components: a heart rate sensor, a pulse oximeter, a motion sensor, built-in speakers, a heat and red light element, and a magnetic charging port. Hypnuse Pro includes the full set. Hypnuse Rhythm is the heated option. Both pair with the Hypnuse app so you can review your nights.
Here’s the honest expectation for week one. You won’t be “fixed” by Tuesday. You’ll be learning three things: how the mask sits on your face, which features you actually like, and what your own baseline looks like. Think of the week as calibration. People who treat it that way tend to keep the mask. People who expect instant results are the ones who send it back.

Before Night One: Unbox, Charge and Check the Fit
Do this in daylight, not at 11 p.m. when you’re tired and impatient.
- Charge it first. Connect the magnetic cable and let it reach a full charge before the first night. A half-charged mask can switch off mid-session and make you think something is broken.
- Read the quick-start card. Button actions differ between models, so use the card in your box rather than guessing.
- Do a mirror fit check. Put the mask on while sitting up and look for gaps near the nose bridge and cheeks.
- Do a lying-down check. Fit changes the moment your head hits the pillow, so test in your normal sleep position.
The strap should feel snug, not tight. If you can feel pressure on your eyeballs or lashes, loosen it. Hypnuse masks use an elevated eye cavity so you can blink freely, and that design only works when the mask isn’t cranked down. A light-leak at the nose is the other classic problem. Pull the mask slightly down toward the bridge and re-seat it before touching the strap.
Keep a spare charging cable somewhere obvious. The Magnetic Charging Cable is a small add-on that saves a lot of frustration if one gets lost or left in a hotel room.
Night One: Pair the App and Set Your Baseline
Download the Hypnuse app (there’s a QR code on the Hypnuse homepage footer) and follow the on-screen pairing steps. Keep your phone nearby and Bluetooth on during setup.
Then resist the urge to change everything. On night one, I’d suggest a simple goal: wear the mask all night with no extras. No heat, no soundscape, no routines. You’re collecting a clean baseline so you can tell later what helped and what didn’t.
Two small habits make the baseline more useful:
- Go to bed at roughly your normal time. The CDC’s sleep guidance recommends a consistent schedule and a bedroom that is quiet, dark and a comfortable temperature.
- Put the phone down early. If you want a calmer lead-in, our AI sleep mask wind-down page explains how the mask supports your pre-sleep routine.
If you feel slightly odd wearing something on your face, that’s normal. Most people adapt within a few nights.
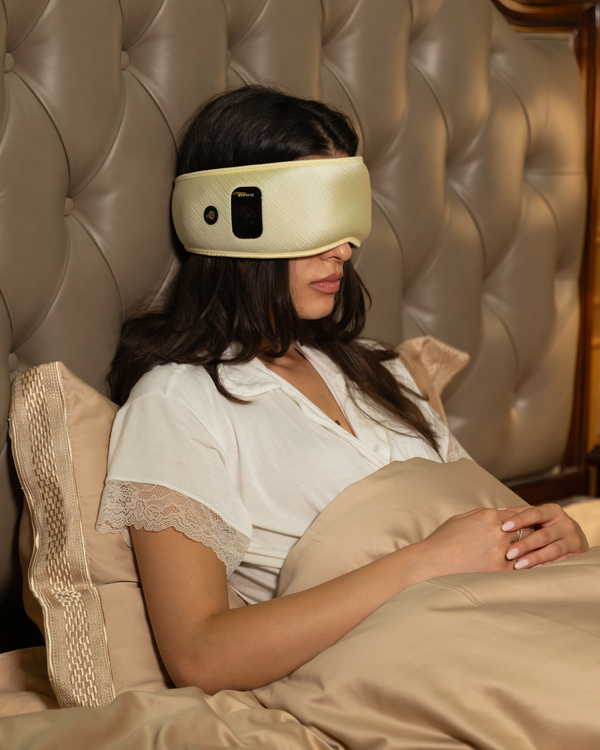
Your Day-by-Day First-Week Plan
Here’s a simple schedule. Adjust it freely, since the point is to change one thing at a time.
| Night | Focus | What to note in the morning |
|---|---|---|
| 1 | Fit and baseline, no extras | Comfort, light leaks, whether it stayed in place |
| 2 | Fine-tune strap and position | Pressure marks, side-sleeping comfort |
| 3 | Add gentle heat (heated models) | Did it feel relaxing or too warm? |
| 4 | Try one soundscape or white noise | Helpful, distracting, or neutral? |
| 5 | Try a guided breathing session | How you felt as you drifted off |
| 6 | Combine your favorites | Which combination felt best? |
| 7 | Review the week in the app | Patterns, not single nights |
Notice what the plan avoids: stacking features on night one. If you add heat, sound and breathing all at once and sleep badly, you’ll have no idea which one was the culprit. Changing one variable at a time is the same principle behind any good experiment.
Getting the Fit Right: Light Leaks, Pressure and Side Sleeping
Fit is the number one reason new users get frustrated. A mask that leaks light or presses on your eyes undermines everything else it does.
Start with light. Lie down in your normal position in a dim room and look for pinpricks of brightness. The nose bridge and the outer corners are the usual suspects. Small adjustments to the strap length or the mask’s position on your face often solve it. If you’re curious how blackout design affects light-sensitive sleepers, our guide to a sleep mask for light sensitivity goes deeper.
Next, pressure. You should not feel the mask on your eyeballs. If you do, loosen the strap a notch before you do anything else.
Finally, side sleeping. Pillows can push a mask out of position. Try a slightly lower or softer pillow, and check that the strap sits flat against your head instead of twisting. Wearing it during a short test lie-down on your side before bed saves you a lot of mid-night fumbling.

Heat, Sound and Breathing: Add Features Slowly
Once the fit is sorted, you can start layering features. Which ones you have depends on your model.
Heat. Warmth around the eyes can feel soothing before bed, and Hypnuse heated models offer adjustable levels. Start at the lowest comfortable setting. If your skin feels hot, irritated or uncomfortable, stop using heat and contact support. If you’re deciding between heated and non-heated designs, Hypnuse Rhythm is the heated-focused option and Hypnuse Pro combines heat with the full sensor set.
Sound. Built-in speakers let you try white noise or soundscapes without earbuds. Keep the volume low. You want something that fades into the background, not something you’re actively listening to. If a sound keeps your attention, it’s the wrong choice for tonight.
Guided breathing. A slow breathing routine gives your mind something simple to do while your body winds down. Treat it as practice. Your first session may feel awkward, and that’s fine.
Smart wake-up. If your model supports a gentle wake-up feature, save it for the second half of the week, once you trust the fit and the routine. Waking up to an unfamiliar sound on night two is a quick way to dislike the whole experience.

Reading Your Sleep Data Without Overthinking It
The sensors in a smart mask record things like heart rate, blood oxygen and movement. That data can be fascinating, but it can also make you anxious if you obsess over one bad night.
My advice: look at trends, not single mornings. By night seven you’ll have a handful of data points. Ask simple questions. Did you fall asleep more easily on the nights you used breathing? Did you wake less often with white noise? Did the heated nights feel better or just warmer?
Please remember that a sleep mask is a wellness product, not a medical device. Its data can’t diagnose a sleep disorder. If you snore heavily, stop breathing at night, feel exhausted despite long sleep, or have persistent insomnia, talk to a doctor. Don’t rely on an app score for that.
Charging, Cleaning and Care
Good habits here protect your mask and your skin.
- Charge on a routine. Plug in during the day or at a fixed time so you never start the night at low battery.
- Keep the charging port clean and dry. Follow the care instructions that came with your model.
- Clean the fabric gently. Hypnuse masks use soft, breathable materials, so avoid harsh chemicals and follow the care card.
- Store it flat or in its case. Crushing it in a bag can bend the contour that blocks light.
Travelling soon? The mask works well on planes, and our travel-friendly options are covered on the Hypnuse Eye Mask collection page.

Common First-Week Problems and Quick Fixes
| Problem | Likely cause | What to try |
|---|---|---|
| Light leaking at the nose | Mask sitting too high | Re-seat gently toward the bridge, then adjust the strap |
| Pressure on eyes | Strap too tight | Loosen one notch and re-test lying down |
| Mask slips at night | Strap twisted or pillow too high | Flatten the strap, try a lower pillow |
| App won’t connect | Bluetooth off or low battery | Charge fully, enable Bluetooth, retry pairing |
| Heat feels too warm | Level set too high | Lower the level or turn heat off |
| Sound is distracting | Volume or track not a fit | Lower volume or try a simpler sound |
If none of these work, contact the Hypnuse team before you give up. Most fit and connection problems are fixable in minutes.
What If It Still Isn’t Right? Trial, Returns and Warranty
Hypnuse offers a 14-night trial and a 1-year warranty. That trial window is meant to give you enough time to run the week-one plan above and decide with real experience. Read the Return Policy and Warranty Policy for the exact conditions, and don’t wait until the last night to decide.
Not sure the smart features are right for you? Browse our Sleep Tips and compare options in Sleep Headband vs Sleep Mask.
Conclusion
The first week with a smart sleep mask is about patience and process. Charge it, fit it, pair it, then add heat, sound and breathing one at a time. Keep notes, look at trends, and don’t judge the mask on a single night.
If you follow the plan and your sleep still doesn’t feel better, use the trial period, contact support and look for the fit that suits you. Ready to start? Explore the Hypnuse Eye Mask collection, or revisit How It Works if you’d like to understand the technology behind each feature.
Frequently Asked Questions
How long does it take to get used to a smart sleep mask?
Many people feel comfortable within a few nights, though it varies. Give it at least the full first week, and adjust the strap and your pillow before deciding it isn’t for you.
Should I use all the features on the first night?
No. Start with just the mask on night one, then add heat, sound or breathing one at a time. That way you can tell which feature actually helps you.
Is it safe to wear a heated sleep mask all night?
Use heat at a comfortable level and stop if your skin feels irritated or too warm. Follow the safety instructions for your specific model, and ask a healthcare professional if you have eye or skin conditions.
Can a smart sleep mask diagnose a sleep problem?
No. It’s a wellness product, and its data shows trends, not diagnoses. If you have ongoing sleep difficulties, loud snoring or breathing pauses, see a doctor.
What if my mask won’t pair with the app?
Charge the mask fully, make sure Bluetooth is on, keep your phone close and try pairing again. If it still fails, contact Hypnuse support.


